A TATTY TUESDAY TO YOU!
Have you ever wanted to buy a particular rubber stamp...but hesitated because you don't think you'll ever use it enough to justify it's purchase price?...and that it may be only fit for one particular purpose?
Well, todays Tatty Tuesday might help you to reconsider the designs and look beyond what the eye initially sees. Sometimes that stamp can offer you a little more scope and versatility than you first realise and enable you to use it in projects and designs beyond what the original design intended.
As someone interested in altered art, I always try to keep an open mind about materials and items that can be reused in ways other than their original purpose and I also try to look at rubber stamp designs in that same way too. I like to take elements from designs and stamp them out to see what else I can do with them and increase their potential (and so make them more cost effective). Although I know other crafters do this...I don't really think there is a particular term for this technique...
...so I have decided to call it ALTERED STAMP ELEMENTS.
I'm using three Tatty Button designs to prove the point and using them in the form of paper piecing (ie cutting out the stamped images and piecing them together to form other shapes. Some stamp designs might allow you to stamp and group the elements directly together without the need for cutting out and layering up....but it really depends on what you have available and how easy it is to ink up and isolate the various sections.....clear stamps are best for this as you can see where to position the stamp.
I'd also like to point out that the fist two designs were initially discovered and used by Karen Lines and Sue Wilson for Creative Expressions.
TUTORIAL No3 - ALTERED STAMP ELEMENTS (using paper piecing)
TOOLS REQUIRED -
I'm not completing a full project piece in this tutorial...rather I'm just showing you how to reuse elements from stamps and using three Tatty Button designs as examples in basic forms...therefore basic tools required. It will then hopefully help you look at all the stamp designs YOU own and see what you can take elements from and incorporate into your own artwork.
For my examples I used
-
Main stamp images - for this tutorial I used TB14 (Tatty Button Bits and Pieces), TB3 (Rainy Days), and TB8 (Pip)
Paper and/or cardstock - coloured and patterned
Ink (in this case Ranger Distress Ink - Black Soot)
Acrylic blocks for applying the stamps
Scissors
TUTORIAL -
First, stamp out your full image, in black ink, onto a spare piece of white paper...so that you can see all the details clearly. Then look carefully to see if there are any areas that could be isolated to be used to create a different design. The closed umberella design above has potential with the main triangular shaped section to be used in multiples and pieced togther to form shapes. The handle section is not required.
Ink up the stamp and multiple stamp out onto your chosen paper. I am using a simple plain coloured piece so that you can see the designs more clearly as we progress with the tutorial. If you can avoid inking up the areas that are not required, all the better, but because in this particular technique we are cutting out the shapes, it is not so important - the unwanted sections will be cut away.
Cut out all the pieces...depending on your design and size of and personal preference, use the cutting tool of your choice.
Now the fun begins as you start piecing the seperate cut out shapes together. I always stamp and cut out more pieces than I think I will need....in order to allow extra to experiment with - further cutting up, or bending, folding and reshaping.
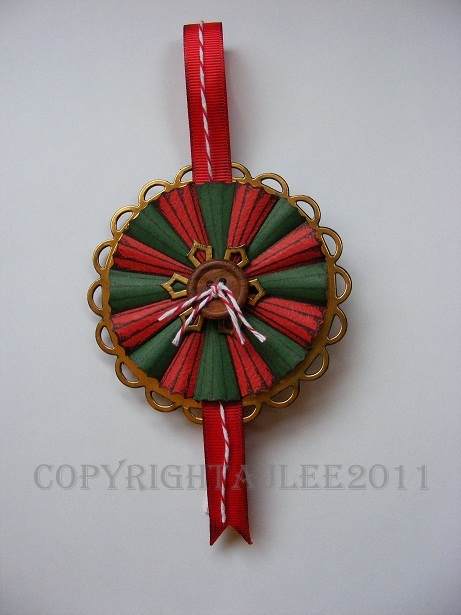
This particular piece can be placed side by side to start forming a fan shape.
7 pieces will allow you to create a half circle - or fully opened out fan.
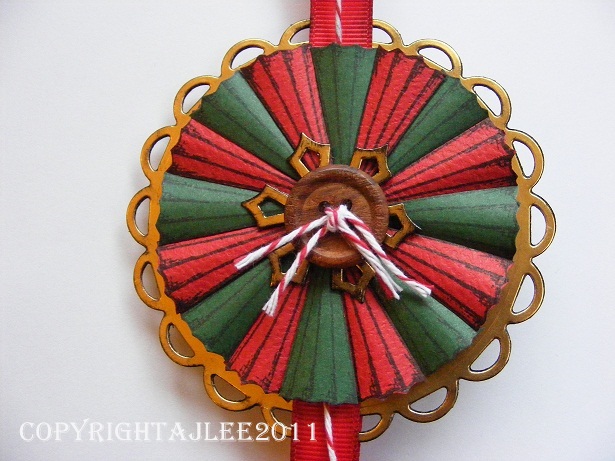
14 pieces creates a full circle which has the potential to be made into a flower - just add a decorative centre. Each individual piece can act as a petal and you could use as many or as few as you want....and even layer up on top of each other to create a decoupaged flower effect!
Further dimension can be created by gently curving the pieces....or scoring and folding along the lines.
A mixture of flat and shaped pieces can be used with interesting effect...such as laying out alternatively...or even layering a curved piece ontop of a flat piece.
They can be used to form wings or tails....
...such as for this simple butterfly.
So now you can see how an umbrella shape can be recreated into a flower, a butterfly or fan....start looking at what can YOUR stamps can do for you.
Talking of butterflys...here's another...using a section from another Tatty Button Stamp....
...using the open umbrella section from this full Tatty Button figure!
This simple little fantasy flower....
....is actually an ear from this Pip image...stamped and cut out to form seperate petals.
Not all pieces will require cutting out and reforming. You might have stamps with areas that could be used to create patterns and texture...and used like a background stamp.
I hope this has given you food for thought.
...oh, and I will be creating a project using this technique in the coming weeks...so stay tuned.
Tatty Ta Ta for now!