Friday 23 December 2011

MERRY CHRISTMAS AND A HAPPY NEW YEAR!

My last post for the year for 2011 and it is to Wish you all a very Merry Christmas and a Happy and Peaceful New Year.

Many thanks to you all for taking the time to pop by this Blog, read up and comment...it is all very much appreciated....by both myself and my little Tatty Button and her friends.

...and so, to end this post....I give you a little bit of general knowledge. Did you know that apparently most British Robins migrate to southern warmer climes at this time of year? they leave our Isles to escape what they believe is cold weather!...and the birds we see during winter and the Festive period are more than likely Robins that have migrated in from the Far Eastern countries such as Russia...to escape their very hostile cold temperatures....they must feel they are on a sunny holiday! So, if you see a little RedBreast on Christmas day, bid him a Merry Christmas in Russian lol! BTW - the photo I took of this little Robin above, was in the summer of 2009...so a very British little chap.

Takes cares and enjoy your holidays where ever you go, what ever you do!

xxx

Wednesday 21 December 2011

Chocolate Marshmallow Fudge and Christmas favor name tags

Well, that certain festive day is drawing close. Have you got your presents all wrapped, sent your cards and iced that cake yet?

I have to admit I'm pretty organized this year...which is pretty scary for me! probably due to the fact that Christmas is being spent with my family, at home in Birmingham this year....no panic packing of bags and trying to get things done a week or so in advance in order to head off to Worcester to spend the holidays with Clives mom. The meal this year is being held at my sisters and so I'm not having to cook much so it's a pretty laid back affair for me. We do share the cooking responsibilities though and this year I've been given the task of providing the sweet course so that's all fine and prepared in advance. I also make a Christmas cake for them every year. In the past these have been unusual, unique and highly decorative but this year it's simple but classy.

So, Christmas day will be a lazy morning for Clive and I, smoked salmon and scrambled egg breakfast with Bucks Fizz, open our presents to each other then tootle off to sisters place early afternoon (thankfully she only lives around the corner) for the traditional mahoosive feast of turkey and beef.

There are eight of us sharing Christmas this year and my sister is really doing a grand job of a table setting so she asked if I could make some name tags for each place setting...

...and seeings as I am in charge of sweets I decided to incorporate some chocolate truffles as Xmas favors - Irish Cream flavoured for the adults, milk choc for the youngsters. All bagged up in silver and black to co-ordinate with her choice of colour scheme, tags formed using Spellbinders dies and each name cut out in fancy font in card using my good old Cricut Create and Gypsy. Pretty silver cord and a tiny silver bauble finished off each package. She's indicated a few things she's got planned for the design....so can't wait to see the table in all it's glory on the day!

Anyways...onto the main reason for my blog post. A few weeks ago I was given a recipe for easy cook fudge...one made with chocolate and marshmallow, that I was assured is yummy and takes minutes to make and no faffing about with sugar thermometers...so how could I not want to try that!

So today I did just that. Very sorry but I can't credit who's recipe this is...it was passed on from a friend...from her friend and we think it might be something off a tv cooking programme but can't be sure. I did a bit of googling to see if I could work out who...but no joy...so if anyone knows the answer, please let me know.

INGREDIENTS
70g   Butter
300g Soft Brown Sugar
125g Evaporated Milk
225g Marshmallows
300g Milk Chocolate (cut into small pieces)
75g   Dark Chocolate (cut into small pieces)

Prepare an 8inch cake tin by lining with greaseproof paper.
Place butter, sugar and evaporated milk into a large pan and melt gently over a low heat. When all has dissolved, stir in the Marshmallows. Boil for 5 mins, making sure the marshmallow has dissolved. Working quickly, take immediately off the heat and stir in the chocolate. Leave 1 minute then stir to completely combine and ensure the chocolate has melted (please note this mixture, at this moment is VERY hot so yes the gooey choccy mass looks so tempting that you want to stick your finger in to try some...PLEASE don't you'll burn yourself very badly).

Quickly pour into the prepared tin and allow to set for approximately 3 hours. Then remove from tin and paper, cut into approx 2cm squares and box/bag up as required.
And there you have it....soooo simple to make and I can honestly tell you it is ABSOLUTELY DELICIOUS....smooth, velvety and squidgy (because I have relented and munched on some...but then I have to do this and taste it otherwise I wouldn't be able to give you the recipe if it was all horrible and nasty tasting lol!). A dusting of icing sugar was all that was left to make them a little festive.
 
Enjoy......now go finish that present wrapping!

Tuesday 29 November 2011

TATTY TUESDAY No3...PART 2!

A TATTY TUESDAY TO YOU!

Todays I'm posting a follow on from TT No3s post about Altered Stamp Elements (see HERE )

As I promised , I have completed a piece using this technique, and have made a rosette xmas hanging ornament using the closed umbrella stamp.

ALTERED STAMP ELEMENTS - ROSETTE XMAS ORNAMENT

TOOLS REQUIRED - (to make a double sided ornament)
  • STAMP - closed umbrella image from TB14 plate Tatty Button Bits and Pieces
  • Black Stazon ink
  • Acrylic block for applying stamp image
  • Red Cardstock (I used textured card)
  • Green Cardstock (I used textured card)
  • Gold Mirri cardstock
  • Spellbinders Nestabilities die S4293 Lacey Circles
  • Spellbinders Shapeabilities die S4340 Create-a-Flake Three
  • 2 wooden buttons
  • Red Grosgrain ribbon 1.5cm wide and 36cm long
  • Red&White Bakers Twine
  • Old coarse bristled artists paintbrush or blending tool
  • Glue (Glue gel and tape works best)
  • Die cutting machine
  • Scissors
Following the tutorial set out for the Altered Stamp Elements I stamped out 16 umbrella images onto red card, and 16 umbrella images onto green card (remembering to leave out the handle part) then cut out the images and curved all the pieces to create dimemsion. These were then set aside.
Using my Cuttlebug die cutting machine and the Gold mirri card, I cut out two each of the listed dies - using the second largest lacy circle (9cm approx diameter) and the mid sized snowflake. The two largest circles were glued back to back and the edges slightly aged using black Stazon ink and the brush. The two snowflakes were also inked but not glued together.   

The red grosgrain ribbon was folded in half and glued across the large die cut circle so that it lay each side...forming a loop at the top and the two ends at the bottom. A length of bakers twine was then layed across the ribbon in the same fashion, and secured in place. Black Stazon ink was brushed gently across the ribbon to age it.
The stamped and cut out pieces were then sorted out into two equal piles, each containing 8 red and 8 green parts and assembled and glued into full circle rosettes of alternating colours - one each side of the gold circle.
The small die cut snowflakes were then glued to the centre of each rosette, topped off with a wooden button tied with extra offcuts of the bakers twine.

So, there you go! This piece was constructed double sided so that it can be hung up...as both sides will be seen but you could easily make just one side...and perhaps use it for a card topper...or even an embellishment/tag on a present.

Tuesday 22 November 2011

TATTY TUESDAY - No 3

A TATTY TUESDAY TO YOU!

Have you ever wanted to buy a particular rubber stamp...but hesitated because you don't think you'll ever use it enough to justify it's purchase price?...and that it may be only fit for one particular purpose?

Well, todays Tatty Tuesday might help you to reconsider the designs and look beyond what the eye initially sees. Sometimes that stamp can offer you a little more scope and versatility than you first realise and enable you to use it in projects and designs beyond what the original design intended.

As someone interested in altered art, I always try to keep an open mind about materials and items that can be reused in ways other than their original purpose and I also try to look at rubber stamp designs in that same way too. I like to take elements from designs and stamp them out to see what else I can do with them and increase their potential (and so make them more cost effective). Although I know other crafters do this...I don't really think there is a particular term for this technique...

...so I have decided to call it ALTERED STAMP ELEMENTS.

I'm using three Tatty Button designs to prove the point and using them in the form of paper piecing (ie cutting out the stamped images and piecing them together to form other shapes. Some stamp designs might allow you to stamp and group the elements directly together without the need for cutting out and layering up....but it really depends on what you have available and how easy it is to ink up and isolate the various sections.....clear stamps are best for this as you can see where to position the stamp.

I'd also like to point out that the fist two designs were initially discovered and used by Karen Lines and Sue Wilson for Creative Expressions.

TUTORIAL No3 - ALTERED STAMP ELEMENTS (using paper piecing)

TOOLS REQUIRED -

I'm not completing a full project piece in this tutorial...rather I'm just showing you how to reuse elements from stamps and using three Tatty Button designs as examples in basic forms...therefore basic tools required. It will then hopefully help you look at all the stamp designs YOU own and see what you can take elements from and incorporate into your own artwork.

For my examples I used
  •  
  • Main stamp images - for this tutorial I used TB14 (Tatty Button Bits and Pieces),  TB3 (Rainy Days), and TB8 (Pip)
  • Paper and/or cardstock - coloured and patterned
  • Ink (in this case Ranger Distress Ink - Black Soot)
  • Acrylic blocks for applying the stamps
  • Scissors
TUTORIAL -
First, stamp out your full image, in black ink, onto a spare piece of white paper...so that you can see all the details clearly. Then look carefully to see if there are any areas that could be isolated to be used to create a different design. The closed umberella design above has potential with the main triangular shaped section to be used in multiples and pieced togther to form shapes. The handle section is not required.
Ink up the stamp and multiple stamp out onto your chosen paper. I am using a simple plain coloured piece so that you can see the designs more clearly as we progress with the tutorial. If you can avoid inking up the areas that are not required, all the better, but because in this particular technique we are cutting out the shapes, it is not so important - the unwanted sections will be cut away.

Cut out all the pieces...depending on your design and size of and personal preference, use the cutting tool of your choice.
Now the fun begins as you start piecing the seperate cut out shapes together. I always stamp and cut out more pieces than I think I will need....in order to allow extra to experiment with - further cutting up, or bending, folding and reshaping.
This particular piece can be placed side by side to start forming a fan shape.
7 pieces will allow you to create a half circle - or fully opened out fan.

14 pieces creates a full circle which has the potential to be made into a flower - just add a decorative centre. Each individual piece can act as a petal and you could use as many or as few as you want....and even layer up on top of each other to create a decoupaged flower effect!
Further dimension can be created by gently curving the pieces....or scoring and folding along the lines.

A mixture of flat and shaped pieces can be used with interesting effect...such as laying out alternatively...or even layering a curved piece ontop of a flat piece.

They can be used to form wings or tails....

...such as for this simple butterfly.
 
So now you can see how an umbrella shape can be recreated into a flower, a butterfly or fan....start looking at what can YOUR stamps can do for you.
 
Talking of butterflys...here's another...using a section from another Tatty Button Stamp....

...using the open umbrella section from this full Tatty Button figure!

This simple little fantasy flower....

....is actually an ear from this Pip image...stamped and cut out to form seperate petals.

Not all pieces will require cutting out and reforming. You might have stamps with areas that could be used to create patterns and texture...and used like a background stamp.

I hope this has given you food for thought.

...oh, and I will be creating a project using this technique in the coming weeks...so stay tuned.

Tatty Ta Ta for now!

Tuesday 4 October 2011

TATTY TUESDAY - No2

A TATTY TUESDAY TO YOU!

Welcome to the second Tatty Tuesday...and it's another tutorial for you!

TUTORIAL No2 - Embossing Powder & Distress Ink resist stamping technique -
PIP HEART HANGER


This is one of my favourite ink effects, using layers of colours and stamp images it looks complex but is actually quite simple to achieve as long as you follow the proceedure in the correct order. I use this technique alot for making tags and hangers out of mountboard....the card is heavyduty enough to take numerous applications of inks and heat from the embossing.

TOOLS REQUIRED -
  • Main stamp image (for this tutorial I am using 'Pip' Tatty Button stamp product TB8)
  • Flower embellishment stamp (from 'Tatty's Flowers' stamp plate product TB16)
  • TWO large background stamp plates (need to be large enough to cover the whole area of the shape you're stamping onto, and of good contrast in design - I am using Paperartsy script and The Artistic Stamper hearts designs)
  • Heart shape piece of card ( I have used artists mountboard with the shape cut from a Spellbinders Nestability die - Classic Heart (largest size))
  • small scrap of white paper
  • white card
  • sheets of plain copier paper or brown wrapping paper
  • Black ink - Stazon or similar permanent waterproof variety
  • Ranger Distress Inks - Black Soot, Tattered Rose, Fired Brick, Aged Mahogany, Tea Dye and Walnut Stain.
  • Clear embossing ink
  • Clear embossing powder
  • Heat gun
  • Iron (non steam)
  • craft scissors and/or knife
  • Ink applicator pads
  • Heatproof work surface and craft sheet/mat
  • Vintage ribbon/American Seam Binding in ivory
  • fine spritzer/mister filled with clean water
  • 2 silver coloured hat pins (with red bead ends) or similar embellishments (optional)
  • Glues, foam tape
  • Hole punch
  • Black satin cord 

NOTE ABOUT MOUNTBOARD - Picture Frame Mount board is a great material to use for this type of project. It generally has a smooth paper coated side and a slightly more textured other and it takes inks well. It comes in various colours but a light shade is advisable when using pale ink colours. I wanted to use the Spellbinder heart design die but this is obviously not thick enough to completely cut out the shape in the mountboard. Using a combination of plates and shims I ran the m/board and die through my CuttleBug to make an impression which I then followed through with cutting out using a craft knife. The edges were also gently sanded with a fine grade sandpaper to smooth any rough edges. If you have different die and/or die cutting system then please refer to manufacturing instructions.

NOTE ABOUT BACKGROUND STAMPS - The effectiveness of the resist technique depends on the designs of the stamps selected. The first stamp plate used will be with the black ink and it's a good idea to go with a fine detail such as script. The second stamp plate will be used with the clear ink and embossing powder and player the major part in the resist technique....so it needs to be a design with decent large solid plain areas that are not too fussy. Because of the romantic style of this heart hanger, I selected a fine detail romantic script and a nice repeat pattern of small plain hearts. 

NOTE ABOUT EMBOSSING POWDER - The quality of the clear powder used is not that important, as long as it's reasonably fine. It is used purely as a resist or mask and you are going to be actually removing the enamel so the glossy shine isn't required! I use a lot of embossing powders and over time alot of it gets dirty and 'contaminated' with bits and imperfections so I keep this is a separate jar to be used especially for these types of techniques. Do not attempt this technique using a coloured embossing powder...even though you are melting it back off, it is highly probable that some colour will remain visible and can ruin your project.

TUTORIAL-

The first thing you need to do is make a mask of your main stamp image. Using any ink, stamp out the image onto thin plain paper (I use cheap photo copier paper). It isn't necessary to achieve a good or perfect image, just as long as you can see the design. A border is required around this image so you need to work out how deep you wish this to be and roughly mark it out with a pencil.
Tear or cut around the image remembering to leave the border....I prefer to tear as the edges are much softer.
The mask is now all ready to use...but set it aside for now.
The next step is to start colouring up your heart shape using inks. These will be the base colours.
The base colours need to be the lightest shades. The Tattered Rose and Old Paper colours are applied with the Ink applicator pads....the pink shade covers most of the centralised area with the beige tones concentrated around the edges. If you wish to create a more distressed effect you can now splatter the inked up shape with water and then dry to achieve a dappled effect. The mountboard I have used already has a mottled effect so I leave mine at this stage.
The paper mask is now placed in the section where you want the final image to be stamped (in this case to the left and some of the image will hang off the side). This mask will prevent further inks from covering this area and leaves the pale pink base coat free to help highlight the final stamp image.
Ink up your first background stamp plate (script) with black Stazon ink and with the mask in place, stamp up over the whole of the heart shape. In the photo above the mask has been partially removed to show you how this area remains free of the script stamping. Also not that I have not achieved a perfect stamp image and it's slightly patchy and irregular...this is ok as a distressed uneven look is required and when further ink colours etc have been applied it will not be that noticeable anyway.

It is now important in this next stage to get all your preparations ready beforehand. Reposition the mask exactly over the unstamped area. Then gather together your second background stamp plate, clear embossing ink, clear embossing powder and heat gun. Card coloured with distress inks tends to become extra static and you will find the powder sticks to areas you do not want...to prevent this, you can blot and then heat set the ink...then treat it with anti static before you go onto the next stage.
Ink up your second background stamp plate (hearts) with clear embossing ink, then with the mask still in place, stamp the design over the whole of the heart shape. Remove the mask, then working quickly, cover the entire shape with clear embossing powder. Carefully shake off the excess and heat set the remaining powder using a heat gun.
You will now have clear embossed heart shapes overlaying the black inked script stamp section. Allow this to cool before proceeding on with the next step.
Taking your darker shades of distress inks (Fired Brick, Aged Mahogany & Walnut Stain) start applying the colours over the stamped up sections of the heart...avoiding the majority of the area which was masked out (this area needs to be kept as light a colour as possible). The stamped and embossed sections now start playing their part as a resist - the darker shades do not colour these areas, exposing the paler colour underneath.

A closer look at the mask and ink resisted areas.

The next stage involves you removing the embossed ink...the glossy enamel resist is no longer required as it will now hinder further applications of ink colour to these areas. Prepare a flat heatproof work area and set your iron to a medium heat. If you are using a domestic steam iron then the water tank must be empty of water and the steam generator turned off. Using a specialist craft iron is advisable and irons used for this and any other craft technique should not be used for domestic ironing or else there may be contamination, damage and staining of the clothes. I have an old domestic iron I use for my artwork as I can cover larger areas...but I also use a smaller craft iron for small detailed work. Neither of these are used for ironing clothes!
Place the mountboard heart on the flat heatproof worksurface and cover the whole piece with either plain copier/blotting paper or brown paper. Then press the iron over this for a few seconds. The embossed enamel will melt and absorb into the paper. Do not hold the iron over the piece for too long....keep stopping and checking your progress. Recover with a clean piece of paper and re-iron if not all of the enamel has been removed the first time around.
The above photo shows how the enamel has been absorbed into the paper. Usually you can see this happening as a greasy image begins to show through the paper as you iron.
You now Black ink up and stamp your main image (Pip) into the area that was previously masked. Having the border helps you to centralise the image. If you are colouring in the image, you need to consider the type of ink you are stamping with. You can use Stazon if you are using distress inks....but if you are using alcohol based inks or pens (such as Promarkers) you need to use a dye based ink such as Memento.
Using Distress Inks, start shading and highlighting areas...I have re-enhanced the edges of the hearts using the darker shades, including Black Soot which has created dimension and defined the shapes. The edge of the mountboard heart shape has also been inked up.
Close up photo of the added dimension created by using inks to shade areas around the hearts.

The heart shape is now complete of stamping and colouring and the next step is to create and place embellishments onto the hanger.
Ink up the flower stamp image with Black Stazon and make multiple images onto plain white card stock. You will need three flower images.
Cut out the flower shapes using fine detail/decoupage scissors.
Then colour/ink up each one....using Tattered Rose, Fired Brick and Aged Mahogany.
The Flowers will be layered up and the top one will be the lightest colour (T Rose). You can now add more dimension by shading in with darker ink colours and even over-stamping the bottom two flowers with the script stamp.
Distress Ink colour can be applied in small detail by using Cut-n-Dry nibs (Ranger).
White edges of the cut card can also be coloured in with black ink using these nibs as the fine point can get right down into the corners.
The next stage is to custom colour your ribbon so that it co-ordinates with the heart. Vintage/Seam Binding ribbon is excellent for taking on colour via Distress Inks, achieving a distressed worn look. This will be formed into a bow to be attached to the heart....so work out how big you wish this to be and cut a length accordingly.
Using the non stick craft sheet, smudge ink directly from the ink pad onto the surface - start with the lightest shade first (Tattered Rose) then lightly spritz over this with water. Scrunch up the ribbon in your hand then roll it into the diluted ink patch, scrunching and patting until you get the colour coverage and effect you're after. You can dry it quickly with a heat gun or allow it to dry naturally before adding further colour. This technique creates a faded tatty look but if you want a more deeper even colour coverage you will need to apply more ink...or even apply the ink directly from the pad to the fabric.
This is the first base colour. If you wish to stop here, then do so....otherwise repeat the step above using a darker shade of ink.

Distress Ink - Fired Brick and a touch of Black Soot has been used to create a deeper colour with more depth. Form and secure this ribbon into your bow shape.

It's now time to assemble the piece together.
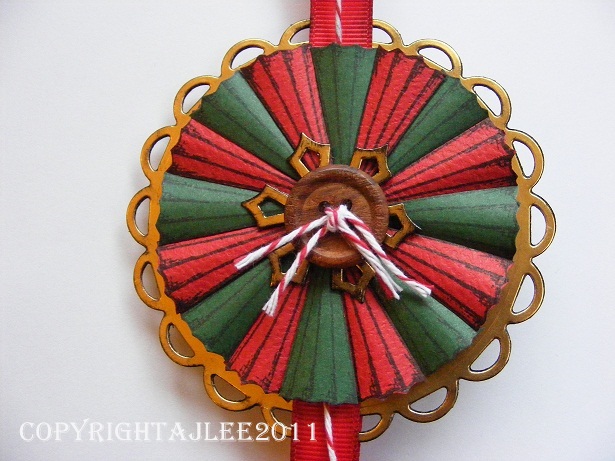
Layer up the Flowers using dimensional foam tape (or gel glue) with the ribbon bow and hat pins (if using)...place to the right of the main stamped image. I have further enhanced the heart theme by punching out a tiny red heart and positioning it into the centre of the flower. Beads, brad or a button could equally do well here. Punch a hole top center of the mountboard heart and thread through the black silk cord.
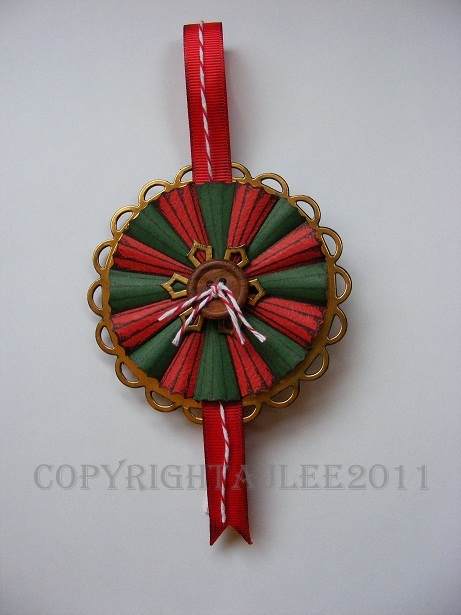
The completed Pip Heart Hanger using Distress Ink Stamp resist technique.


Here are some examples using the same technique but as Tags, using different stamps images and ink colours.

I hope you've enjoyed todays Tatty Tuesday tutorial....if you decide to give this project a go, please let me know how you get on.